The Team

The Team

Thursday, December 3

Day IX - Learn. Think. Innovate.

Greetings from the NTU School of Material Science E-Learning Studio!

Today all of us spent most of day preparing for the innovation challenge presentation. All the very best for all groups! :) Here are some quotes that keep us going:


CAN'T WAIT FOR TOMORROW!! >.<

Wednesday, December 2

Day VIII - TMI!!!

On Synthesis Of Nano Materials Using Novel Biological Templates

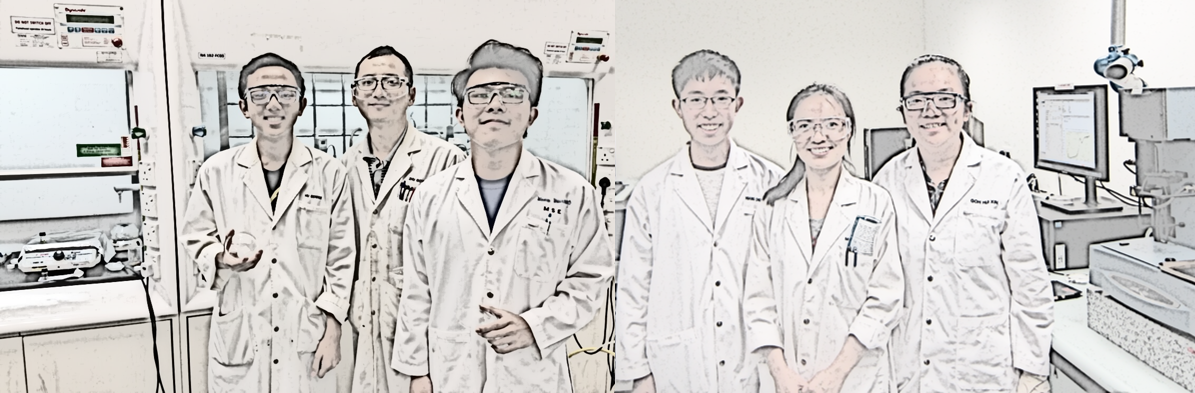
Today, we continued on our experiments!! WOO

First, we learnt that current collectors are usually made of copper or aluminium foil, where copper foil would usually be the cathode and the aluminium foil is usually the anode.

What are current collectors?

In order for the battery to have an acceptable capacity, the active material is almost always a thick layer of porous, particulate paste, and the electronic conductivity of this material is seldom very high. Hence it is necessary to have a current collector, which is usually a metal grid or sheet, to provide a conducting path through the paste and thereby minimize the resistance of the battery. The current collector also acts as a physical support for the active mass which otherwise would be a very brittle structure.

Did you know that an electrode is made out of 3 parts?

These parts are the Conductive Agent, the Binder, and the Active Material.

For our experiment, we used carbon as our conductive agent. 

We also used a polymer called Polyvinylidene Flouride in a solvent N-methyl-2-pyrrolidone (PVDF (NMP)) as our binder. 


Lastly, our active agent was Molybdenum Sulfite, made out of:

250μl of protein + Molybdenum (1mol/100μl) + L-cysteine (1mol/200μl)

mixed at 4°C.

Finally, we took a look at the structures of the samples in a SEM Session.

Skin-inspired Pressure Sensors

IT’S FINALLY TIME FOR TESTING!

With our PDMS film already conductive, we can finally test the sensitivity of the film. First, we prepared an electrode base that will link our PDMS film and the motorized test stand. After that, we paste our PDMS film with Silver nanowires which is followed by another layer of PDMS film without Silver nanowires which function as a tape to hold down PDMS film with Silver nanowires on electrode base.

PDMS film on gold electrode base

After PDMS film sample is ready for the force, we place the sample sheet under a force sensor.

 
Motorized test stand

Forces ranging from 0.200 N to 1.000 N are then applied periodically for 200 cycles. Results are then translated into a current-time graph. We observed that current is directly proportional to current; the bigger the force exerted, the lower the resistance of the pressure sensor, thus the higher the current detected is! Then, we also watched the current-time graph going up and down repeatedly as the machine constantly applies the pressure onto the PDMS film.

I-t graph going up and down repeatedly 

Besides current-time graph, the same experiment is also used to produce a current-voltage graph which gradient reflects the resistance (in this case equals to the sensitivity of pressure sensor). We observed that as bigger force is exerted, the graph plotted is steeper which means resistance is higher. 

I-V graph

And that is the end of the day with Dr. Zhu and Dr. Chen! Now, moving on to the innovation challenge :)

Tuesday, December 1

Day VII - Structures and More!

HELLOW EVERYBODEH!!

On Synthesis Of Nano Materials Using Novel Biological Templates

Today, we did some experiments, it was fun! We learnt lots of stuff, so much that a single blog post isn't enough! 

We began by making the metal precursor for the synthesis of the electrode's material. We mixed Cobalt Nitrite together with 2-Methylimidazole to create this precursor, a purplish liquid. Then, we put them on a magnetic plate to mix for 24 hours.

We also learnt about graphene, which is a single layer of the carbon atoms present in the many layered graphite. 

What's so interesting about that?

Graphene is a very strong material, and is very good at conducting electricity. It's strong structure is due to it hexagonal arrangement of the carbon with strong covalent bonds between them that requires a lot of force to displace.


Skin-inspired Pressure Sensors

♫♫♫Today is a rather long day at NTU but also relaxing because of the Chinese song in the lab that soothes our soul ♫♫♫


So today, we continue our journey of making the skin-inspired pressure sensors. The PDMS film that we made yesterday was still incomplete, because it is still NOT CONDUCTIVE!

No worries, EASY-PEASY :) The solution is actually just spraying a suspension of Silver Nanowires (AgNWS) of 0.1 mg/ml concentration over the film. But before that, we need to first put the film in the Plasma-Surface Technology for surface cleaning.
Plasma Surface Technology
This is to make sure that the silver nanowires stick to the film surface. The machine is first vacuumed and then injected with oxygen. The cleaned film is then placed on a hot plate at 100°C to make the solvent evaporate more easily.
Spraying on Hot Plate
After all these steps, AgNWS solvent is then sprayed over the film on the same hot plate and after a few shots, we can finally test the conductivity of the film.

Testing Conductivity
After a fun lunch break, we get to know our PDMS film better by having an up-close look into its structure, using Scanning Electron Microscope (SEM) of course. Through SEM, we discovered the following:


Silver Nanowires on PDMS's Surface


Silver Nanowires


Pyramidal Structure of PDMS Film


Silver Nanowires on PDMS's Surface
 That marks the end of Day 7!      

*sudden realisation that this attachment is ending :((( We’re overly attached now ))): *


Monday, November 30

Day VI - New Beginnings :))

ON THIS FATEFUL DAY, OUR LIVES HAVE CHANGED. FOR BETTER OR FOR WORSE, WE DO NOT KNOW, BUT REST OUR FATES IN THE HANDS OF OUR NEW MENTORS.

On Synthesis Of Nano Materials Using Novel Biological Templates

Today we met our new mentor, Dr. Lu Yan. She seems like a very busy person, and we admire her dedication to her work. We were shocked when we found out that she conducting not one, not two, but THREE experiments at once! This, as explained by her, was because the waiting time for results is very long, and can last up to days. Hence, she had to maximise her time and take on as many projects as possible.

One of those projects was the use of proteins to increase the cycle life of batteries and decrease the amount of time needed to charge them.

"Imagine that you can charge a battery for 5 minutes, and yet it can last for months!" - Dr. Lu Yan said with excitement.

One of these proteins is an elastin-like peptide, 
[(VPGIG)2(VPGKG)(VPGIG)2]16 (no joke). 

The protein is very peculiar. When submerged in metal precursors (metal ion solution), such as cobalt, iron and nickel ion precursors, the -NH2 group in the protein would act as an active site. 

Cobalt (II) Precursor
Thus, when the precursor is added, and after carbonising the protein, it would have a three-dimensional structure, which is due to the highly porous structure of the protein itself.


This allows lithium ions in the electrolyte to quickly insert themselves and remove themselves from the electrodes.

Since the transfer of lithium drives the flow of electrons, it will ensure that the battery has high performance.

First, we had to measure about 100mg of the protein, 2 samples.

We then added water into about 100mg of the protein.


However, the experiment was then put on hold as the protein cannot dissolve in water at room temperature and had to be cooled to 4 degrees centigrade (which would take many hours).


Skin-inspired Pressure Sensors

Today is finally the start of our second week of the MSE attachment programme at NTU.

Remember what we said about our final day with Dr. Lu last week? Well, that is because we were getting a new mentor for a different module this week. So today was the day we started to embark on a journey to make skin-inspired pressure sensors under the guidance of Dr. Zhu and Dr. Chen.

According to Dr. Zhu, this project aims to develop a pressure sensor that can help people regain their sense of touch by simply applying pressure onto it. This actually sounds too good to be true right? Well guess what, this is actually possible!

The main material we will be focusing on is a biocompatible material called Polydimethylsiloxane (PDMS). With increased pressure, the resistance of the PDMS will decrease, hence allowing more current to pass through. As a result, more force can be exerted. The challenge is that we need to make sure that the PDMS film is sensitive enough to detect the change in pressure and this can be done by increasing its electrical conductivity.

The main ingredients that we will be using to make the pressure sensor is silicone elastomer base and curing agent in the weight ratio of 10:1.

The Ingredients
By mixing the two solutions for 5 minutes, we will obtain a gel-like mixture. Then, we put the mixture inside the desiccator to remove the bubbles formed in the mixture.
Desiccator
After that, this mixture will then be spread on a Si/SiO2 mold.

Si/SiO2 Mold

Using the high rotational speed of a spin coater, the mixture will then spread evenly on the mold.
Spin Coater
After that, we will bake those mixture inside an oven for about 2 hours at 80°C. Upon baking, skin-like film can then be easily peeled off from the mold and TADAAH! we have our polydimethylsiloxane (PDMS) film that will be used in the pressure sensor.

We then viewed our PDMS film through a microscope and guess what we saw?! Nope! We didn’t only see squares; we actually saw pyramids! So apparently, PDMS film has pyramidal structures which increase both the conductivity and thus sensitivity of the film.
Top View of The Pyramid Structures
And that marked the end of day 6 of our research shadowing today! :D


Friday, November 27

Day V - Farewell :'(

On Synthesis of Nano Materials Using Novel Biological Templates

Finally, the long-awaited moment of using the TEM has arrived.

YES, this morning we were told by Dr. Lu that we could use the TEM today! We immediately headed to the TEM room at B4 level. As we entered the room, we noticed that the TEM machine is surrounded by curtains. The purpose of this is actually because TEM is very sensitive to dust and vibration. That’s why setting up the curtains will prevent any disruption to the entire process.
Dr. Lu Operating TEM
We also learned that TEM manipulates the electron beam using the magnetic field in order to achieve higher and better magnification of the image.
Magnified Image of Sample
After two hours of long-wait, we finally got our results and that marked the end of our morning session.
TEM Results
After our lunch break, Dr. Lu introduced to us to another mind-blowing equipment called the Thermogravimetric Analyzer, also known as TGA furnace. It is basically a thermal analysis method to measure the physical and chemical properties of a material which, in today’s case, is the Mo2C mixture on nickel foams from yesterday!
TGA Furnace
We first cleaned and burnt a platinum pan for 2 minutes to remove the impurities. Then, we placed it on the sample holder of TGA. 10 mg of our sample (Mo2C mixture) is then placed on the platinum pan. After that, we can simply send the sample down to the aluminium furnace.
Cleaned Platinum Pan Sent Down to Furnace
Sample will then be heated up to various temperature (max. 1000°C) and TGA will then plot a temperature-mass graph for us to examine the physical and chemical properties of sample.
Temperature-Mass Graph
This amazing day then ended with a short heart-to-heart talk with Dr. Lu. From her sharing, we understand that being a researcher or a scientist is definitely not easy. One doesn’t become a successful researcher just by the long list of skills needed. Patience, perseverance and passion is ultimately the key of being a successful researcher. Also, the success of a researcher is definitely not defined by how many reports you have written. A researcher is considered successful when he is able to see the unseen; when he is able to turn the useless useful; when he is able to transform his burning passion in his heart into reality :)

And that marked the end of our first week at NTU MSE as well as our last day with Dr. Lu :(


Thank you so much Dr. Lu for mentoring us for the past one week and sharing with us your invaluable experience and knowledge on Material Science! It has indeed been fun and enriching! :D 


From left: Frederick, Mrs. Lu Yan, Stella 

Skin-inspired Pressure Sensors


WE HAVE CREATED THE AWESOME TRANSPARENT PRESSURE SENSORS!


BUT... HOW GOOD ARE THEY? LET'S FIND OUT.


Today we used a UV-VIS Photo-spectrometer to test the transparency of the film.


UV-VIS Photospectrometer


Graph


A problem we faced yesterday was that the PDMS films would stick to each other, rendering the sensor to be insensitive to pressure. Hence, we then underwent the process of fluoridation to make the surfaces of the films super hydrophobic.


We placed the pieces in a desiccator for about 30 minutes - 1 hour.


From Left: Mitchel, Mr. Zhu Bowen, Rayson


And thus, we parted tearfully from our mentors. WE WILL MISS YOU!!! :'(

Thursday, November 26

Day IV - Exploring Materials

*wear lab. coat, protective gloves and goggles*
Greetings from NTU School of Material Science and Engineering! :D

On Synthesis Of Nano Materials Using Novel Biological Templates

Today, we can finally start creating our own lithium battery! As usual, under the guidance of Dr. Lu, we prepared a mixture comprising Carbon Nanotube Composite (Mo2C) and Super P Carbon, which will be the main components of the electrode for our battery. Then, we grind it for approximately 20 minutes (well boring but this is necessary) to obtain finer particles.


Grinded Mixture
After that, we added a few drops of Polyvinylidene fluoride (PVDF) which is the binder of the two solids in the mixture, followed by a few drops of N-Methyl-2-pyrrolidone (NMP) solvent. This mixture was then left on the magnetic stirrer while we went for lunch (nomnom!)
Magnetic Stirrer
After lunch, we returned to the lab and proceeded to prepare our electrode! We used porous nickel foam as our electrode substrate, which is a current collector for our electrode.
Nickel Foam
After cutting it into small square pieces, we took the electrode mixture (mentioned above) from the magnetic stirrer and then spread it over these nickel foams.
Spreading Electrode Mixture
Product :D
And that’s the end of day 4, and tomorrow is when things get more interesting…

Skin-inspired Pressure Sensors

Today was a relatively short day. Yesterday, we created the prototype of the pressure sensor.


HOWEVER, IT WAS GOLD BUT NOT TRANSPARENT!

Hence, we made another pressure sensor, but this time, TRANSPARENT.

Instead of the gold base we used, we used another piece of PDMS film, and thin copper wires instead of the copper tape, using Gallium Indium paste to stick the wire to the sensor. The sensor is now virtually invisible, hence allowing it to be used to a variety of applications, such as touch screen devices.
The transparent prototype as compared to:

However, the results of this new transparent pressure sensor was not satisfactory. :(

Due to its greater thickness, the pressure sensor was not as sensitive to changes in pressure. It needed greater pressure applied onto it for a response in its I-V curve.

Despite this, we learnt the importance of testing the prototype extensively and to constantly do error checking to ensure the quality of the pressure sensor.

Check out our updates tomorrow!

Wednesday, November 25

Day III - More Testing

On Synthesis Of Nano Materials Using Novel Biological Templates

So today we continue our journey with the few samples we prepared yesterday. After leaving them in the super low temperature freezer (about -75°C) overnight, all of our samples are frozen. These frozen samples contain ice as well which, according to Dr. Lu, will affect the following procedures of examination. Thus, in order to remove the ice crystals in sample, we are introduced to a method called freeze drying.


Freeze Dryer
First, we sealed the samples with an aluminium foil, after which we put all of them in a jar. Then, we attached it to the drying chamber in the vacuum freeze dryer and left it to dry. Hence, another night to waittt.

After our lunch break, we immediately headed to B4 level to see for ourselves and learn more about the Transmission Electron Microscopy (TEM). 


Transmission Electron Microscopy (TEM) 
Alas, due to certain technical problems, we were unable to do it today [NOOOO D:<]. Fortunately, Dr. Lu had prepared her own back-up plans to enlighten us and keep us occupied and happy! She then introduced a battery testing method to us. In the lab, there are myriads of ways to create your own batteries (which is in our to-do-list for tomorrow). In order to test the quality of the batteries, we have to connect our batteries to a datalogger.
Datalogger 

This datalogger will the measure the performance of the battery, represented by the voltage-capacity graph. The higher the magnitude of plots, the better our battery is!

Skin-inspired Pressure Sensors


WE CONTINUE OUR JOURNEY ON THE ROAD TO PRESSURE SENSORS

Today we learnt an interesting fact: PDMS is not harmful to the human skin! That makes it more convenient as we can now apply it for human use without any drawbacks. After creating the PDMS film with silver nanowires, we then proceeded to create the electrodes that would be the points that are connected to the power source.

Gold electrode 
After piecing the two together, we tested to see if the sensor works as intended.


Afterwards, we went to conduct tests to see the relationship between the amount of force exerted on the sensor and the amount of resistance it has. We learnt that the average sensor has a maximum limit of 10 kPa as well!


The I/t graph of the experiment 

The I/V graph of the experiment 

The rise and fall of the current as the machine repeatedly applies pressure onto the sensor 


WOOHOO! The graph shows accurately what we predicted for the I-V behaviour of the PDMS sensor - that when pressure increases, resistance of the sensor decreases, hence current increases.

We watched the machine go up and down and UP AND DOWN LIKE 250 TIMES so that we could find the percentage error in the readings.

We tried to test the sensitivity of the sensor by attaching it to our wrist and measuring our pulse rate, but our pulse WAS TOO WEAK.

This then marked the end of the day, so close to the final result!